Walk-In Closet Lighting Ideas: Ambiance and Practicality
Introduction

If you are planning or upgrading a walk-in closet, lighting is the detail that can make or break the space. It changes how you see your clothes, how you feel getting ready, and even how the room adds to your home’s value. This article covers walk-in closet lighting ideas that balance ambiance with practicality. You will find real advice on fixtures, placement, and common mistakes—no fluff, just decisions you can use.
Good lighting does more than just brighten a room. Poor choices create harsh shadows, wash out colors, or leave dark corners where you store your best shoes. You might not think about color rendering until that navy suit looks black. You might not miss dimmers until you want a soft glow instead of full blast. This guide is here to help you avoid those frustrations and design a setup that works for your routine.

Why Lighting Matters in a Walk-In Closet
Lighting in a walk-in closet serves two roles. First, it is task lighting. You need to see the difference between charcoal and black, find the left shoe in a pair, and check for lint or wrinkles up close. Second, it is ambient lighting. A well-lit closet feels larger, more luxurious, and easier to move through. A badly lit one feels like a storage room.
Color rendering index (CRI) matters more here than in any other room. Low-CRI bulbs wash out fabric tones and make everything look flat. Your cream blouse might look gray. Your burgundy sweater could look brown. High-CRI lighting (90 or above) preserves true colors and helps you dress with confidence. Travelers who want consistent color accuracy throughout their home may want to check out high CRI LED bulbs for task lights.
Glare and shadows are the other culprits. A single overhead fixture casts shadows on shelves and inside drawers. Your body blocks light when you reach for a tie or belt. Good planning spreads light where you actually need it, reduces eye strain, and makes the space feel more open.
The Layered Lighting Approach for Walk-In Closets
The single most important concept in closet lighting is layering. Think of it as three layers working together instead of one fixture doing everything.
- Ambient lighting is the base layer. It fills the room evenly and sets the overall brightness. Think recessed cans, flush-mounts, or a chandelier.
- Task lighting focuses on specific work zones. LED strips under shelves, puck lights inside drawers, or sconces near mirrors.
- Accent lighting highlights displays. Picture lights over a jewelry cabinet, spotlights on a handbag shelf, or LEDs inside a glass shoe case.
Without layering, your closet looks flat. You get no depth, no drama, and no flexibility. A single overhead light creates that shadowless warehouse effect that makes everything feel boring. With layering, you can switch between bright and moody, highlight your favorite pieces, and actually see what you are grabbing.
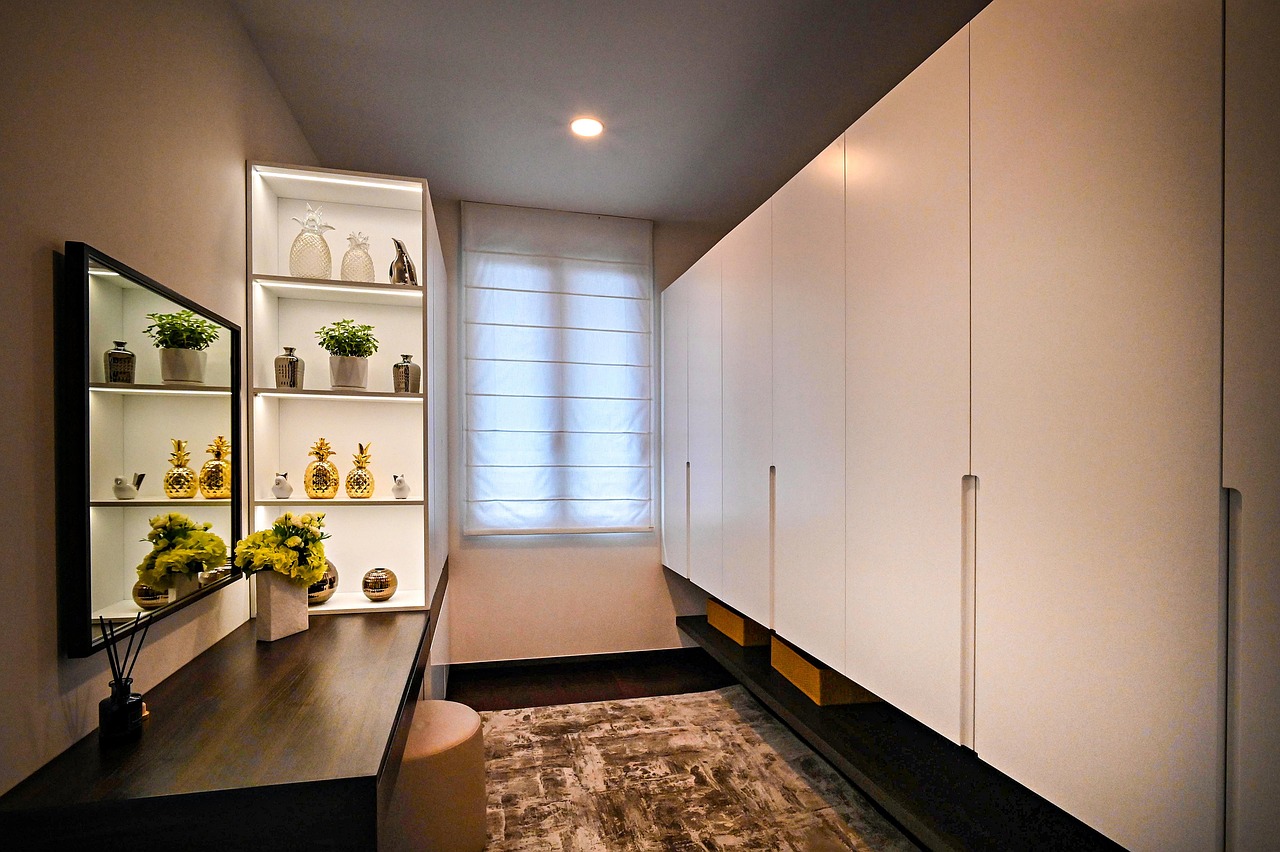
Ambient Lighting Options: Overhead Fixtures That Set the Mood
Ambient lighting is your base. It needs to spread light evenly without creating harsh shadows or glare. Here are the most common options and when to use each.
Flush-mounts and semi-flush fixtures are the practical choice for most closets. They sit close to the ceiling, so they do not interfere with hanging rods or tall storage. Look for ones that direct light downward through a diffuser rather than exposing bare bulbs. Warm white (2700K to 3000K) creates a cozy feel that flatters skin tones and fabrics. Avoid cool blue tones—they make everything feel clinical and wash out colors.
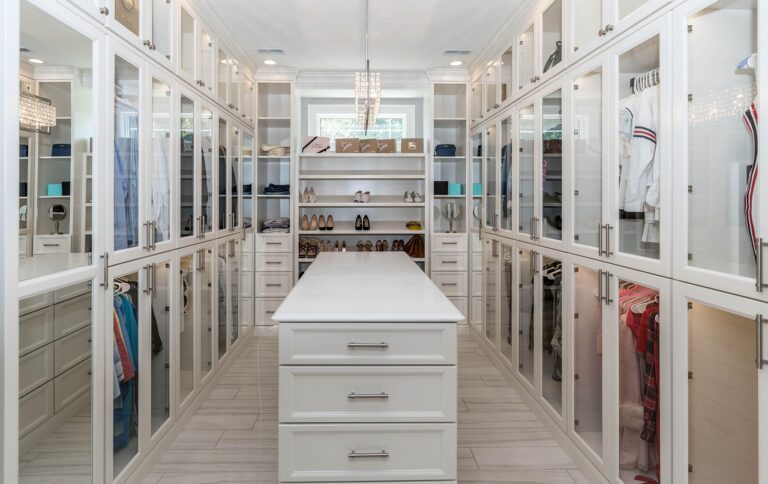
Chandeliers and pendants add visual drama but require enough headroom. If your closet has a tray ceiling or an island in the center, a small chandelier can become a focal point. Just make sure it hangs high enough that you never hit your head when reaching for a top shelf. Dimmers are essential here. A chandelier at full brightness can be overwhelming. Dimmed down, it gives that boutique dressing room feel. For longer trips or large spaces, consider small warm white chandeliers to add elegance without losing functionality.
Track lighting offers flexibility for awkward layouts. You can angle individual heads toward specific zones—clothing rods, a dressing mirror, or a shoe wall. The downside is that tracks can look busy. If you choose track lighting, pick a low-profile rail and warm white heads.
Regardless of the fixture, install dimmers. They let you adjust brightness based on the time of day or your mood. One fixture can serve as ambient light during the day and a softer mood light in the evening.

Task Lighting: Where Precision Meets Practicality
Task lighting solves real problems. Dark corners, shadowed shelves, and hard-to-see drawer interiors all need dedicated light sources.

LED strip lights under shelves are the gold standard. They cast light downward onto folded shirts, shoes, or accessories. The key is placement. Mount them toward the front edge of the shelf so they illuminate what is below rather than shining in your eyes. Use diffusers to avoid the dotty LED look. Choose strips with high CRI (90 or higher) so colors stay true. Frequent users may benefit from under shelf LED strip light kits that are easy to install and design.
Puck lights work well for small spaces inside drawers, cabinets, or dark corners. They are easy to install—many are battery-powered with remote controls. The tradeoff is battery life. For frequently used areas, hardwired pucks or rechargeables are better.
Swing-arm sconces are ideal near a mirror or dressing area. They provide focused light for checking fit or doing final look adjustments. Position them at eye level on either side of the mirror to eliminate facial shadows.
One common mistake is placing strip lights only at the back of a shelf. That casts shadows forward, leaving the front of your clothes dark. Always position task lights so the beam hits exactly where you are looking.
Accent Lighting: Highlighting Your Best Pieces
Accent lighting is the bonus layer. It is not essential, but it adds character and makes the space feel curated. Use it to draw attention to special items: a favorite handbag, a display of watches, or a row of designer heels.
Picture lights mount directly above a shelf or valet rod and cast a narrow beam downward. They work well above a single accessory or a framed piece of art. Keep them subtle. The light should emphasize the item, not overpower the room.
Spotlights or goosenecks from a ceiling track or cabinet top can angle toward specific displays. They are more directional than picture lights and work for taller items like boots or hats on high shelves.
Glass shelf LEDs inside cabinets turn ordinary storage into display. If you have a glass-front shoe cabinet or a jewelry armoire, adding a thin strip of warm LED along each shelf makes the contents pop.
Start with one focal point. A single handbag shelf with a small spotlight is better than trying to accent everything. Once you see how it changes the feel of the room, you can expand.
LED Strip Lighting: Installation Tips and Common Mistakes
LED strip lights are the most versatile option for closets, but they are also the most commonly installed wrong. Here is how to get them right.
Color temperature matters. Stick with 2700K to 3000K for a warm, natural look that matches incandescent bulbs. Cool white (4000K or higher) makes everything look sterile and unflattering.
Cutting to length. Most LED strips can be cut at marked intervals (usually every 1 to 2 inches). Measure your shelves or rods carefully before cutting. Use connectors for corners or gaps. Soldering is more reliable, but connectors work fine for short runs if you buy quality ones.
Voltage drop. Long runs of LED strips lose brightness toward the end. If your shelf is longer than 15 feet, you need a higher gauge wire or a separate power feed. Test the strip before permanently mounting it.
Diffusers are not optional. Bare LEDs create a spotty, dotty look that cheapens the entire closet. Aluminum channel diffusers spread the light evenly and protect the strip. They are inexpensive and easy to install. A simple way to reduce glare and improve the finish is to use LED aluminum channel diffusers for a polished look.
Common mistakes to avoid: placing strips where they shine directly into your eyes when standing; ignoring voltage drop and ending up with dim light at the far end; using strips without diffusers so the dots are visible; and picking the wrong adhesive for the surface (some strips fall off painted drywall). For areas near dresser tops, use waterproof-rated strips in case of spills.
Natural Light Considerations: Windows and Skylights
If your closet has a window or skylight, you get free ambient light during the day. That is a bonus, but it comes with tradeoffs.
UV damage is the biggest risk. Sunlight fades fabrics, leather, and accessories over time. Install UV-filtering window film or use shades during peak sunlight hours. This is especially true if your closet gets direct afternoon sun.
Glare can be an issue. A window positioned behind your mirror or near your dressing area creates harsh reflections. Position your mirror away from direct sunlight or use adjustable blinds to control the angle.
Consistency is another concern. Natural light changes throughout the day. Your closet will look different at noon than at 7 p.m. Supplement windows with high-CRI artificial lighting so your outfit looks the same regardless of the time you get dressed.
If your closet has no windows, you are not at a disadvantage. You have full control over the lighting quality. Invest in high-CRI fixtures and dimmers, and you can create a consistent environment that beats any windowed closet.

Dimmers and Smart Controls: Convenience Meets Energy Savings
Dimmers are not a luxury—they are a necessity. They let one fixture serve multiple roles. Brighten for precision dressing, dim for a relaxed evening routine, or lower completely when you want a soft nightlight for early mornings.
Install dimmers on all ambient and accent lights. Make sure the dimmer switch is compatible with your LED fixtures. Some LEDs buzz or flicker on older dimmers. Look for dimmers rated for LEDs, like Lutron or TP-Link Kasa models.
Smart controls add convenience. Motion sensors turn lights on automatically when the door opens and off after you leave. That is especially useful if your hands are full or you want to save energy. Occupancy sensors work similarly but detect presence rather than just motion—better for closets where you might stand still while choosing an outfit.
Voice assistants can integrate with smart bulbs for hands-free control. “Alexa, dim the closet to 50%” is genuinely useful when you are holding a stack of clothes. Smart controls also let you set schedules, like a gradual brightening in the morning or a dimmed mode for late-night dressing.
Walk-In Closet Lighting Mistakes to Avoid
These are the mistakes I see most often, and they are all avoidable.
- One overhead fixture and nothing else. This creates shadows on shelves and inside cabinets. Your body blocks the light when you reach for anything. Solution: layer with task and accent lighting.
- Low-CRI bulbs. Colors look dull, skin tones look off, and you end up questioning every outfit. Always choose bulbs with CRI 90 or above for any closet.
- Ignoring headroom. A pendant that hangs too low hits tall people or interferes with hanging clothes. Measure your ceiling height before buying anything that hangs down.
- Glare from bare lights. Exposed bulbs near shelving or mirrors create uncomfortable glare. Use diffusers, lensed fixtures, or recessed cans to control the light direction.
- Skipping dimmers. Without them, your closet is stuck at one brightness level, which is rarely right for every situation. Dimmers cost very little and add enormous flexibility.

Lighting for Different Closet Layouts (L-Shaped, Reach-In, Island)
Your lighting plan should match your closet layout, not just your style preference.
L-shaped closets have a corner that is hard to reach and easy to leave dark. Use a corner-specific fixture or a track head angled into that corner. Avoid a single flush-mount centered in the middle of the room—it will leave shadows in the L leg. Install separate task lights on each leg of the L.
Reach-in closets are narrower and often have limited ceiling space. A single LED strip running along the full length of the hanging rod is usually sufficient. Add puck lights inside deep drawers or on upper shelves that are hard to see. Keep it simple—overdesigning a small reach-in adds cost without benefit.
Island setups are common in larger walk-ins. A pendant or chandelier above the island adds visual weight and acts as a room anchor. Pair it with under-shelf strips on all surrounding walls. Be careful: a large pendant can reduce usable overhead space, so measure head clearance carefully. If the island is used for folding or organizing, add a dimmer so the pendant can serve as task light.
Budgeting Your Lighting Project: Cost vs. Value
Your budget determines which options are realistic, but smart spending makes a big difference.
Basic setup ($150–$300). Recessed cans or flush-mounts with a dimmer. This provides even ambient light and covers the essentials. You will still have some shadows on shelves, but it is a solid starting point.
Mid-tier setup ($400–$800). Adds LED strip lights under key shelves, a couple of puck lights for dark corners, and maybe a sconce by the mirror. This is the sweet spot for most homeowners—noticeable upgrade without overengineering.
Premium setup ($1,000+). Includes a chandelier or designer pendant, smart controls with motion sensors, accent lighting for displays, and high-CRI strips throughout. Worth it if you use the closet daily and want a boutique experience.
Where to splurge: dimmers and high-CRI bulbs. These improve every fixture you use. Where to save: basic LED strips instead of custom panels, and battery-powered pucks instead of hardwired options in less-used areas.
Final Checklist for Planning Your Walk-In Closet Lighting
Before you buy or install anything, run through this checklist.
- Measure your space, including ceiling height and the location of hanging rods, shelves, and mirrors.
- Decide which lighting layers matter most for your routine (ambient for base, task for visibility, accent for display).
- Choose a consistent color temperature across all fixtures—2700K to 3000K warm white.
- Plan dimmers for all ambient and accent lights.
- Buy fixtures with CRI 90 or higher.
- Test strip light placement with temporary tape before drilling or running wires.
- Consider smart controls if you want hands-free operation or energy savings.
Your walk-in closet should work as hard as you do. Good lighting is the foundation. Start designing your dream setup—explore the options that match your style and budget.