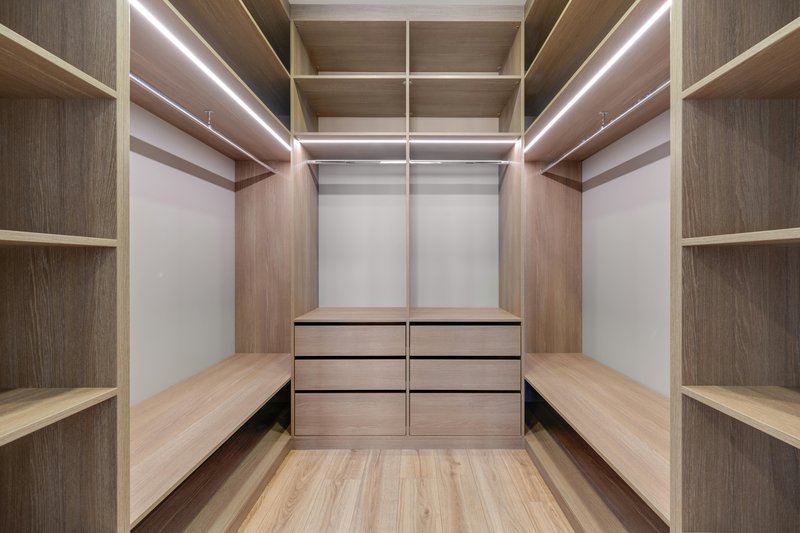
Is Professional Lighting Design Worth the Cost? A Practical Look at Closet Lighting Costs
-
- 86
Introduction
Lighting often gets overlooked in closet projects. People put real thought into shelving, drawer pulls, and paint colors, then just toss in a generic ceiling fixture. But lighting is really what makes a closet feel like a boutique or just a room with clothes in it.
This article breaks down the real closet lighting cost when you hire a pro versus doing it yourself. We’ll cover what you’re actually paying for, where a designer earns their keep, and when you can skip them entirely. If you’re remodeling or building from scratch, this should help you make a solid call.
. For more ideas, check out Eco-Friendly Walk-In Closet Materials and Design:.
What Does a Professional Lighting Designer Actually Do?
A lighting designer isn’t an electrician. An electrician installs what you tell them to. A designer creates a full plan for fixture placement, wiring, dimmers, color temperature, and layered lighting.
They think in layers: ambient light for general visibility, task light for mirrors and folding, and accent light to highlight shelving or architectural details. They’ll specify exactly where each strip or recessed light goes, what beam angle to use, and how to control it all with smart dimmers or scene switches.
The deliverable is a detailed spec sheet or lighting plan that an electrician can follow. That plan covers things most homeowners don’t think about: voltage drop over long runs of tape light, proper spacing for even light distribution, and how to avoid shadows on your face at a mirror.
Without this plan, you’re likely stuck with a basic flush mount and hoping for the best.
Breaking Down the Real Closet Lighting Cost: DIY vs. Professional
Let’s get into the numbers. The closet lighting cost shifts a lot depending on whether you pay for a designer upfront. For a standard 50-square-foot walk-in, here’s a realistic range:
- Professional design fee: $500â$1,500 flat fee or $100â$200 per hour. Some designers charge a percentage of the total project.
- Electrician labor: $500â$2,000 depending on complexity. Running new circuits, adding switch legs, and installing dimmers adds up.
- Materials: $300â$1,200. Includes LED strip lights, recessed fixtures, drivers, dimmers, and smart controls. Designer-specified fixtures are typically higher-end.
- DIY approach (simple kit): $75â$300 for battery-operated puck lights or a plug-in LED strip kit. No electrician needed if you have a nearby outlet.
- DIY approach (hardwired, no design): $200â$600 for materials plus electrician labor if you can’t do it yourself.
A rough all-in: professionally designed and installed lighting for a medium walk-in runs $1,500â$4,000. A DIY version with a plug-in kit is under $300. The gap is real. But value isn’t just in the final look.
The Hidden Value: Why a Designer Can Actually Save You Money
It sounds backward, but paying for a designer upfront can prevent expensive mistakes. A common one is buying the wrong fixtures. A homeowner might grab a 16-foot LED strip kit for a shelf run that only needs 12 feet, then realize they can’t cut it cleanly or hide the extra wire. Or they pick a 5000K strip that makes clothes look washed out.
Designers also solve the shadow problem. Without proper placement, a single overhead light casts shadows on your face at a mirror. That means you need a second fixture or a strip at the top of the mirror. A designer catches this before the drywall goes up.
They also specify exact linear footage of tape light, so there’s zero waste. No buying too much, no returns, no ugly gaps. And they know which dimmers work with which LED strips. The wrong dimmer can cause flickering or buzzing, which means another trip for the electrician.
Bottom line: a designer reduces rework. And rework is expensive. For homeowners who want to explore reliable components on their own, a quality LED strip light kit with dimmer is a good starting point for basic layouts.
When DIY Lighting Makes Sense (And When It Doesn’t)
DIY is a good fit when:
- You have a simple reach-in closet with a single shelf and a rod.
- You’re okay with battery-operated puck lights or a plug-in LED strip hidden behind a valence.
- You don’t need dimming or layered control.
- You’re renting and can’t modify the wiring.
DIY is risky when:
- You have custom wood shelving with integrated LED channels. Getting the routing right takes planning.
- You want recessed lights in a ceiling with limited access above. You need to know exactly where they go before cutting holes.
- You need layered circuits: one switch for ambient, one for task, one for accent. That requires a designer to plan the wiring zones.
- Your closet has an island or a shoe wall that needs balanced light from multiple angles.
If you’re doing a fully customized walk-in with cabinetry, hire a designer. If you’re adding a light to a basic reach-in, pick a kit and save the money.
The Fixture Markup: What You’re Really Paying For
Designers often have trade accounts with brands like WAC Lighting, DMF, or Halo. These aren’t the LED strips you find at a big-box store. They’re higher-quality, with better color consistency, longer warranties, and specific beam angles that generic Amazon kits can’t match.
Take an LED strip kit from a brand like WAC. It might cost $150 for a 10-foot run with a compatible driver and dimmer. That’s about three times what a generic Govee kit costs. But the color rendering index (CRI) is 95+, so clothes look true to color. The strip is field-cuttable at exact intervals. The driver is UL-listed and silent.
The trade-off is real: higher upfront cost for better quality, better integration, and a warranty that actually pays out. If you’re building a closet you plan to keep for a decade, the cost difference is negligible over time.
If you’re on a tight budget, a premium consumer kit like a Philips Hue Lightstrip Plus or a Govee smart LED strip gets you close for a fraction of the price. You lose the custom fit and the high CRI, but you gain flexibility and app control.
Key Decision Factors: Layout, Shelving, and Natural Light
The complexity of your closet layout is the biggest factor in whether you need a pro.
. For more ideas, check out French Country Walk-In Closet Inspiration: Design.
If your closet is a straight run of shelves with a single rod, a simple linear strip across the top does the job. You can do that with a kit in an hour.
If you have an island, a shoe wall with angled shelving, tall cabinets that block light, or a dressing area with a full-length mirror, you need precise placement. An island needs task lighting from above, not from the perimeter. A shoe wall needs accent lights on each shelf to avoid deep shadows. A mirror needs vertical strips on each side to eliminate face shadows.
Natural light also matters. If your closet has a window, you can get away with less artificial light. But you need to control glare and color temperature to match the natural light during the day. A designer can specify tunable white fixtures that shift from warm to cool depending on the time of day. That’s not something you can achieve with a basic kit.
If your closet has zero natural light (most do), you’re entirely reliant on artificial light. That means every layer must be carefully planned. This is where a pro earns their fee.
Professional vs. Premium Smart Lighting Kits: A Comparison
| Feature | Professional Design | Premium Smart Kit |
|---|---|---|
| Placement precision | Custom to your layout | Fixed lengths and spacing |
| Color rendering (CRI) | 95+ typical | 80â90 typical |
| Integration with home automation | Possible but requires extra planning | Built-in app and voice control |
| Total cost (50 sq ft closet) | $1,500â$4,000 | $200â$500 |
| Waste / rework risk | Low | Moderate (cutting mistakes, wrong length) |
| Future-proofing | Can add zones later | Limited by kit capabilities |
A premium smart kit is a solid alternative if you have a straightforward layout and don’t need 95 CRI. The Philips Hue Play Light Bar Kit is great for accent lighting, and the Govee Neon Rope Light works well for linear runs on shelves. Neither matches a custom designer plan, but both are practical and deliver solid results.
Common Mistakes When Budgeting for Closet Lighting
Here are mistakes people make that a designer would catch:
- Underestimating electrician labor. Adding a new switch leg or running wire through finished walls is expensive. Get a quote before you commit to a plan that requires it.
- Forgetting to budget for a new switch leg. Most closets have a single switch at the door. If you want a master switch or a smart dimmer, you may need new wiring.
- Choosing the wrong color temperature. 5000K is too cold for a closet attached to a bedroom. 3000K is comfortable and flattering. Stick with 2700Kâ3000K for residential closets.
- Not planning for maintenance. LED drivers fail eventually. If you bury them in a sealed ceiling cavity, replacement is a nightmare. Designers plan for accessible driver locations.
How to Vet a Lighting Designer for Your Project
If you decide to hire a pro, do your homework. Ask these questions:
- Do you have a portfolio of closet or bedroom projects? General residential experience is fine, but closet-specific work shows they understand the constraints.
- Will you provide a detailed spec sheet? This should include fixture models, driver locations, wiring diagrams, and dimmer specifications. If they only give you verbal advice, that’s not enough.
- What is your markup on fixtures? Some designers charge retail on fixtures they source through trade accounts. Others pass along their discount. Ask upfront.
- Do you work with my electrician, or do you require your own? Ideally, the designer should be able to coordinate with whoever you hire.
- Can you work remotely? Many designers now consult via video call and send plans digitally. This can save you money on travel fees.
Putting It All Together: What’s the Best Move for You?
Here’s how to decide based on your situation:
Budget-focused DIYer. Go with a premium smart kit and DIY install. Use a plug-in LED strip with an app-controlled dimmer. Keep it simple. You’ll spend under $300 and get decent results.
Design-minded dreamer. Hire a lighting designer for a custom plan, but install the system yourself or with a handyman. The plan might cost $500â$1,000, but you follow it to avoid mistakes. This is a smart middle ground.
End-to-end luxury. Hire a designer and a licensed electrician. Let them handle everything from design through installation. You pay a premium, but you get a flawless result with zero headaches.
There’s no wrong answer here, but there is a wrong approach: winging it with a random light fixture and hoping for the best. That’s how you end up with an expensive closet that still feels dark and uninviting.
Frequently Asked Questions About Closet Lighting Design
How many lumens do I need for a walk-in closet?
For a 50â75 square foot closet, aim for 500â800 lumens for ambient light. Add 300â500 lumens for task areas like a mirror or folding counter. LED strip lights typically produce 200â600 lumens per foot, so a 5-foot strip covers ambient needs easily.
Is 3000K or 4000K better for a closet?
3000K is the sweet spot for residential closets. It’s warm without being yellow, and it makes skin tones and clothing colors look natural. 4000K works for utility closets or bathrooms, but it feels clinical in a walk-in.
Can I add lighting to an existing closet without drywall work?
Yes. Battery-operated puck lights or plug-in LED strip kits require no drywall work. Just make sure you have a nearby outlet. For hardwired solutions, you may need an electrician to run new wiring through the ceiling or wall.
Do I need a permit for closet lighting?
It depends on local codes. Adding a new circuit or modifying existing wiring usually requires a permit. Replacing a fixture on the same circuit typically does not. Check with your local building department to stay safe.
Start Designing Your Dream Closet Lighting Setup
Closet lighting is one of those upgrades that gives you a lot of bang for your buck. It changes how the space feels and how you use it every day. Whether you go the professional route or pick a capable smart kit, what matters is to plan before you buy.
Decide your budget, evaluate your layout, and choose the approach that fits. If you want a reliable starting point, look at a premium smart LED strip kit that gives you app control and good color. If you want the best possible result, find a lighting designer with closet experience and invest in the plan.
. For more ideas, check out How to Design a Hollywood Regency Walk-In Closet:.
Start designing your dream setup today. Your clothes and your morning routine will appreciate it.
We break down actual closet lighting costs, compare DIY vs. pro design, and help you decide if hiring a lighting designer is worth the investment for your dream walk-in.
We break down actual closet lighting costs, compare DIY vs. pro design, and help you decide if hiring a lighting designer is worth the investment for your dream walk-in.