How to Organize Shoes in a Walk-In Closet: A Practical Guide
Organize Shoes in Closet: The Complete Walk-In Guide
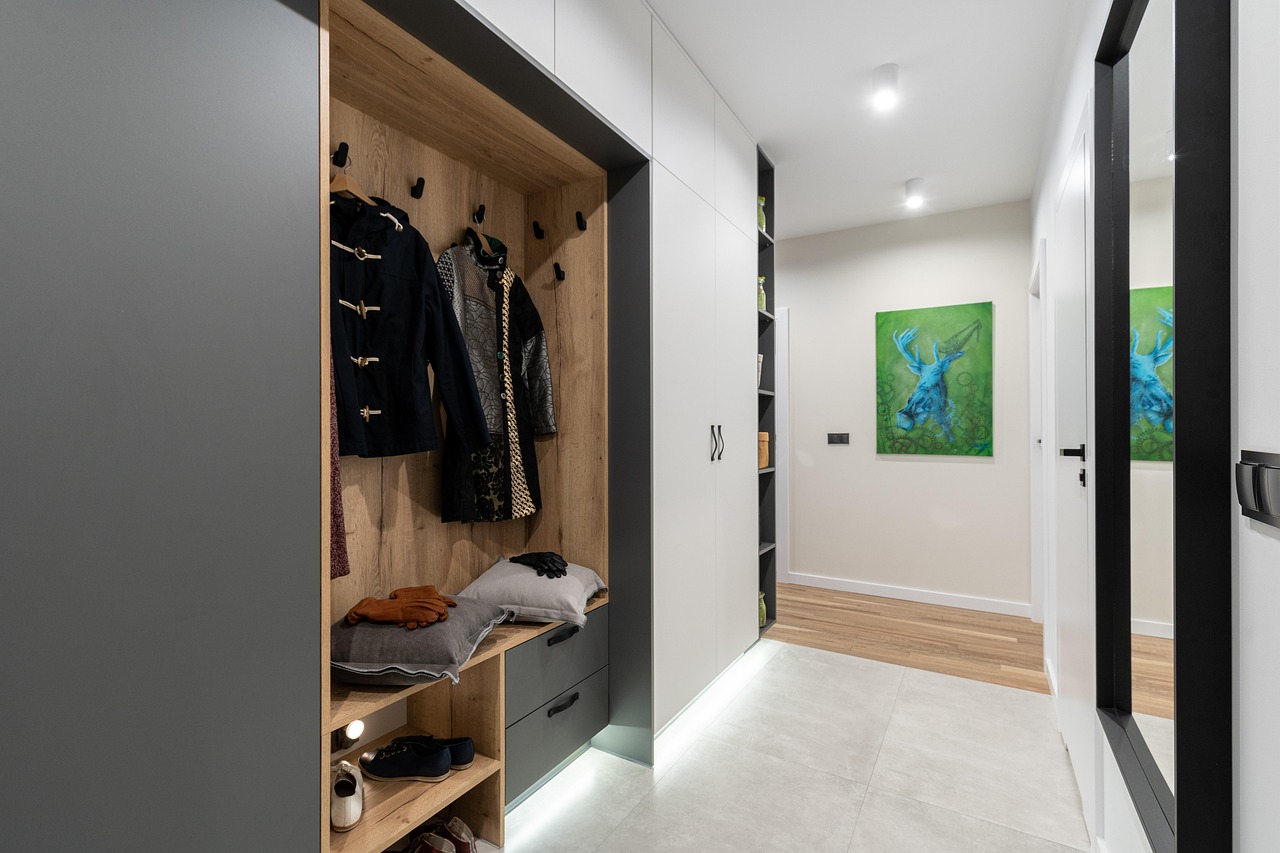
A walk-in closet is a luxury of space, but without a plan, it becomes a dumping ground. Shoes end up in piles, mismatched pairs disappear, and the floor turns into an obstacle course. You know the feeling: you bought the perfect pair, but you can’t find its mate. Or you have to dig through a mountain of sneakers to grab your work loafers. This guide is for homeowners who have a dedicated closet and want to stop fighting with their footwear. If you’re ready to finally organize shoes in closet space effectively, you’re in the right place. We’ll cover practical systems, storage solutions that actually work, and the common mistakes that sabotage your efforts. No fluff, just actionable steps.

Why a Dedicated Shoe Organization System Matters
Think about the time you waste searching for shoes. That adds up. A proper system saves you five to ten minutes every morning. Over a year, that’s a full workday. Then there’s the financial side. A quality pair of boots or heels is an investment. Stacking them on top of each other in a dark corner scratches leather, crushes structure, and traps moisture. That’s how a $200 pair of shoes becomes a $200 regret. Good organization protects that investment by keeping shoes in the right conditions.
Space is the final piece. A walk-in closet should feel like a dedicated room, not a storage unit. When shoes are organized vertically or on dedicated shelving, you reclaim floor space for other items. You can actually see what you own. The value is clear: less stress, longer-lasting shoes, and a room that functions like a boutique. The upfront effort pays off in daily convenience.
Step 1: Audit Your Shoe Collection
Before you buy a single organizer, you need to know what you’re working with. Pull every pair out of the closet. Yes, every single one. Place them on the floor, on your bed, or wherever you have space. Now, categorize them: dress shoes (oxfords, loafers, pumps), casual (sneakers, flats, slip-ons), athletic (running shoes, trainers), boots (ankle, knee-high, winter), and sandals or flip-flops. Group them by type.
This exercise reveals two things. First, you’ll see how many pairs you genuinely wear. Second, you’ll spot the ones you’ve been ignoring for years. Be honest: if you haven’t worn a pair in two seasons, they’re taking up valuable real estate. Donate them, sell them, or give them away. That frees up space and simplifies your whole system. Each shoe type also has different storage needs. Heels need a way to stand without falling over. Sneakers need airflow. Boots need height. Knowing your mix drives your purchasing decisions later.
Step 2: Choose Your Storage System Type
This is where the real decision happens. There’s no one-size-fits-all answer, so match your system to your collection and your closet’s physical constraints. Here are the main options:
- Open shelving: This is the most common for walk-in closets. It’s easy to see everything, and you can grab a pair in seconds. The downside is dust accumulation and visual clutter if you don’t keep it tidy. Best for high-volume collections where you frequently rotate pairs.
- Cubbies: Perfect for sneaker and casual shoe collections. Each pair gets its own bin. Keeps pairs together and looks neat. But cubbies can be depth-heavy, so measure your closet depth carefully. Not ideal for tall boots.
- Pull-out racks: These are sliding trays that let you access shoes from the side or front. Great for deep closets where you can’t reach the back. They maximize every inch of depth but require more precise installation.
- Drawers: Best for smaller collections or for specific types like flats and sandals. They hide everything away, which is great if you prefer a minimalist look. But drawers can be hard to organize internally without dividers.
- Hanging organizers: These are fabric or plastic pockets that hang from a closet rod. They work for lightweight shoes like flats and sandals but are terrible for boots or heavy dress shoes. Good for a temporary solution or for a small closet without much floor space.
My recommendation: if you have more than 30 pairs and want quick access, go with open shelving or tiered racks. If you have a smaller collection and prefer a clean look, opt for cubbies or drawers. For those starting out, a tiered expandable shoe rack is a versatile option that fits most standard closet depths.

Shelving vs. Racks: What Works Best for Each Shoe Type?
Not all shoes are created equal. A one-size-fits-all rack will leave your heels smashed and your sneakers warped. Here’s a breakdown by shoe type:
- Heels and pumps: These need to be stored at an angle or standing upright. Look for shelving that has a lip or a slight tilt so heels don’t fall over. Open shelving with a back lip is ideal. Avoid deep cubbies where they slide around.
- Sneakers and athletic shoes: Airflow is crucial. After a workout or a long day, sneakers trap moisture. Open shelving or wire racks let them breathe. Avoid closed bins or plastic boxes that trap humidity. A tiered rack with good spacing between pairs is perfect.
- Boots (ankle and knee-high): Height is the limiting factor. Measure the height of your tallest pair (usually around 14-16 inches for knee-high boots). Standard shelving is often too short. You need adjustable shelving or dedicated boot cubbies. Boot trees are also essential to prevent creasing at the ankle.
- Loafers, flats, and sandals: These are low-profile and stack well. They work great on tiered racks, in shallow cubbies, or even on a hanging organizer. Their main risk is getting crushed under heavier shoes, so keep them on top shelves.
The tradeoff with open shelving is dust. On the plus side, you see everything. On the minus side, you’ll need to dust more often. The best solution is adjustable shelving, which lets you change the height and spacing as your collection evolves.
Maximizing Vertical Space in Your Closet
A walk-in closet’s greatest asset is often its height. Most people only use the bottom two feet of their closet for shoes. That’s a missed opportunity. Here’s how to use the rest:
- Vertical dividers: Place slim shelves or dividers between existing shelves to create separate cubbies. This keeps pairs from sliding into each other. Good for flip-flops and sandals.
- Stackable shoe boxes: Use clear plastic boxes that stack on top of each other. They protect shoes from dust and make it easy to find the pair you want. Label them with the shoe type or a photo. These are perfect for the top shelves where you store less frequently worn shoes.
- Wall-mounted racks: If your closet has a narrow wall or an unused corner, install a wall-mounted rack. These hold shoes by the heel or by the sole. Great for creating a display wall of your favorite pairs.
- Over-the-door organizers: The back of the closet door is prime real estate. Use over-the-door pockets for flats, sandals, or small sneakers. This keeps them accessible without taking up floor or shelf space.
- Ceiling-mounted hooks or a high shelf: If your closet is tall enough, install a high shelf for a second row of shoe boxes. Use a small step stool to access them. This works well for seasonal or rarely worn shoes.
For those looking to maximize vertical storage, a set of clear stacking shoe boxes with a forward-opening door allows you to see your entire collection at a glance without pulling boxes out.
The Role of Accessories: Shoe Trees, Bags, and Cleaners
Organization isn’t just about where you put your shoes. It’s also about how you maintain them once they’re stored. A pair of leather boots stored properly will last years longer than one left crumpled in a pile. Here’s what you need:
- Cedar shoe trees: These are non-negotiable for leather shoes and boots. They absorb moisture, maintain shape, and prevent creases. Insert them immediately after wearing. A good pair costs $20-$30 each but will extend the life of your shoes by years. Most shoe enthusiasts find cedar shoe trees to be a worthwhile investment.
- Dust bags: For delicate heels, formal shoes, or expensive sneakers, keep the dust bags they came with or buy generic ones. These prevent scuffs when shoes rub against each other in storage.
- A small cleaning station: Designate a corner of your closet for a shoe cleaning kit. You don’t need much: a suede brush, leather cleaner, a soft cloth, and a small resealable bag for polish. Clean shoes once a month and always before storing them for the season.
- Storage bins with dividers: For sandals or flats that tend to get tangled, use small storage bins with internal dividers. This keeps pairs together and prevents search time.
These accessories are often overlooked, but they’re the difference between a system that looks good for a week and one that stays organized for years.
Common Mistakes When Organizing Shoes (and How to Avoid Them)
Even with good intentions, people make the same errors. Here are the most common ones and how to fix them:
- Overstuffing shelves: You buy a rack that claims to hold 15 pairs. You cram in 18. Now nothing fits, pairs fall out, and you can’t see what’s underneath. Solution: follow the manufacturer’s capacity. Leave a few inches of breathing room between pairs.
- Ignoring climate control: If your attic or basement closet is humid, shoes will mold. Leather will crack. Solution: use moisture absorbers (like silica gel packs) or keep a small dehumidifier in the closet. Avoid storing shoes near vents or windows.
- Forgetting seasonal rotation: You store winter boots next to summer sandals. Six months later, you can’t find either. Solution: rotate twice a year. Store off-season shoes in labeled bins on high shelves or under the bed.
- Poor labeling: You buy clear boxes but don’t label them. Now you’re opening five boxes to find your dress shoes. Solution: use a label maker or write on masking tape. Be specific (e.g., “Black Oxfords” vs. “Dress Shoes”).
- Storing dirty shoes inside: You come home from a rainy walk and put boots directly into the closet. They trap moisture and dirt. Solution: always let shoes air dry at the entryway before storing them in the closet.
DIY vs. Custom Systems: Which Should You Invest In?
This is a big decision, and the right answer depends on your budget, your timeline, and your long-term goals.
- DIY wire shelving or modular units: These are affordable and easy to install. You can buy a kit from a home improvement store for $100 to $300 per section. They’re adjustable, so you can change the layout later. Best for: renters, temporary homes, or homeowners on a budget. The tradeoff: they look less polished than custom work and can sag under heavy boot loads over time.
- Custom-built closet systems: These are designed and installed by a professional. Cost ranges from $1,000 for a small walk-in to $5,000+ for a large one. They’re built to exact measurements, use higher-quality materials (wood vs. wire), and look built-in. Best for: homeowners who plan to stay in the house for years and want a permanent, high-end solution. The tradeoff: higher cost and longer installation time.
If you’re on the fence, start with a DIY module in a small section of your closet. Use it for three months. If you love the functionality, you can upgrade to custom later. If you find it lacking, you’ve lost only a few hundred dollars instead of thousands. For a fast and effective DIY solution, look for a modular shoe rack kit that lets you customize shelf heights.

Organizing for Seasonal Rotation
Seasonal rotation is the secret to a small closet feeling spacious. You don’t need to store winter boots next to summer sandals year-round. Here’s how to do it:
- Designate a “current season” zone in the main area of your closet. This is where you keep the shoes you’re wearing now.
- Move off-season shoes to high shelves, under the bed, or into bins in a separate storage area. Use clear plastic bins with lids. Label each bin with the season and shoe types (e.g., “Winter Boots” or “Summer Flats”).
- For delicate off-season shoes, use vacuum storage bags. They compress down to almost nothing. Great for sandals and flats that you won’t wear for six months.
- Twice a year (spring and fall), do a full swap. This also gives you a chance to inspect each pair for damage and clean them before storing.
This simple habit frees up 40% of your closet space instantly. Your current season shoes are easy to find, and your off-season pairs stay protected in storage.
Maintaining the System: Habits That Keep Shoes Organized
You’ve set up the perfect system. Now the challenge is keeping it that way. It doesn’t require a lot of time, just consistency.
- Put shoes away immediately. Don’t leave them at the door. When you come home, take the 15 seconds to place them in their designated spot. Do this every single time.
- Rotate seasonally. Put a reminder on your calendar for April and October. Spend 30 minutes swapping out bins. While you’re at it, give each pair a quick wipe-down.
- Clean occasionally. Take a few minutes every month to dust the shelves and wipe down the plastic boxes. A lazy Susan with a damp cloth is perfect for this.
- Don’t buy more than you can store. This is the hardest habit. When you bring in a new pair, ask yourself: “What am I donating to make room?” Otherwise, the system will overflow.
The system only works if you work it. But once these habits become automatic, you’ll never go back to the pile system.
Final Thoughts: Your Shoe Organization Action Plan
Let’s wrap it up with a clear action plan. Start with the audit. Pull everything out, categorize, and purge. Then, choose a storage system that fits your collection and your closet’s dimensions. Maximize vertical space with stacking boxes and wall-mounted racks. Avoid the common mistakes: don’t overstuff, rotate seasons, and label everything. And decide between DIY and custom based on your budget and how long you plan to stay in your home. The maintenance is simple: put shoes away immediately, rotate twice a year, and clean occasionally. That’s it. Now, you have a roadmap to transform your walk-in closet from a mess into a functional space where every pair has a home. Ready to get started? Explore our recommended shelving options here.