The Ultimate Closet Conversion Guide: Turning a Reach-In Into a Walk-In
Your Closet Conversion Guide: Turning a Reach-In Into a Walk-In
You know the feeling. You open your reach-in closet, and it’s an immediate Tetris game. You wrestle hangers, shove shoes, and still, there’s a pile on the chair. It’s not that the closet is small—it’s just not working. You want more than a rod and a shelf. You want a room you can step inside, something that feels intentional.
This is your closet conversion guide. We’ll walk through the whole process: from the first tape measure pull to the final drawer pull installation. Whether you’re thinking about a simple reorganization or breaking through a wall to steal a few feet from the hallway, I’ve been there. I’ve done two of these conversions myself. One was a straightforward interior reconfiguration that took a long weekend. The other required moving a non-load-bearing wall and turned into a two-week project with a dumpster rental. Both were worth every hour.
We’ll cover what’s possible, what it costs, where the pitfalls are, and the steps you need to take. No fluff. Just practical, experience-based advice to help you decide.

Can You Convert a Reach-In to a Walk-In? Start Here
Before you buy any materials, you need to know if your space is even a candidate. This is where most people get excited and skip ahead. Don’t. A few quick measurements will tell you if you’re looking at a weekend project or a major renovation.
The minimum dimensions for a functional walk-in closet are generally 4 feet deep by 5 feet wide. You need enough depth to walk past hanging clothes and enough width to keep it from feeling like a hallway. Anything smaller and you’re essentially building a slightly larger reach-in that still requires a squat and a reach.
Here’s what to check:
- Depth from the back wall to the existing closet door opening. This is your starting point. If it’s already close to 4 feet, you might just need to reconfigure the doorway.
- Width of the closet interior. Measure from side wall to side wall. If it’s less than 4 feet, you’ll likely need to expand into adjacent space.
- What’s on the other side of each wall. Look at the room or hallway beyond. Is it a bedroom? A bathroom? A hallway that could be narrowed? A dead corner of a room? The best opportunities are usually next to a spare bedroom or a wide hallway.
- Structural walls. This is the biggest dealbreaker. If the wall you want to move is load-bearing, you’re looking at a much more complex job involving beams and permits. More on that later.
A quick reality check: not every reach-in can become a true walk-in. I’ve seen people try to shoehorn a walk-in into a space that was only 3 feet wide. You end up with a narrow corridor where you can barely turn around. It’s not worth the effort. If your space doesn’t meet the minimums, consider a well-designed reach-in system instead. It will serve you better.
Two Paths: Expanding Into an Adjacent Room vs. Reconfiguring the Layout
Once you confirm the space is viable, you have to choose your approach. There are two main paths, and they lead to very different outcomes in terms of cost, disruption, and final result.
Path One: Expanding Into an Adjacent Room
This is the most common way to create a true walk-in. You essentially steal space from the room next door. This could mean pushing the closet wall back into a spare bedroom, taking a bite out of a hallway, or using a dead corner of a large primary bedroom. This path usually yields the best result because it gives you genuine square footage. You’re not just reorganizing; you’re actually creating a new room.
The tradeoffs are real. You lose square footage in another part of your house. That spare bedroom might become too small to be a proper bedroom. You also add complexity: new door openings, patching floors, moving light switches or outlets. Expect dust, drywall, and at least a week of disruption. For this path, I’d budget starting around $3,000 if you do most of the work yourself, and closer to $8,000 if you hire out all the framing and finishing.
Path Two: Reconfiguring the Existing Layout
This path works when your closet is already deep enough but poorly laid out. Think a standard 6-foot deep reach-in with a single rod. By changing the door location, adding an interior wall, or simply reversing the swing, you can create a small but functional walk-in without moving a single exterior wall.
This is the less expensive, less disruptive route. You’re essentially building a new room inside the existing closet footprint. The tradeoff is that your walk-in will likely be smaller. But for many homeowners, a well-organized 4×5 walk-in beats a chaotic reach-in every time. My first conversion was this type. I took a standard 2×6 reach-in and turned it into a small L-shaped walk-in by building a new interior wall and moving the door. Total cost was under $500 in materials for framing and drywall alone. The storage system cost extra, but the structural work was minimal.
What You’ll Need: Tools and Materials Checklist
You don’t need a truckload of specialty gear, but you do need the right basics. Here’s the toolkit I use for any closet conversion that involves new walls:
- Stud finder – A magnetic one is better than the electronic kind. It finds nails, not wires.
- Laser level – A necessity for marking level lines for framing and shelving.
- Drywall saw – Get the one with the sharp, pointed tip. It makes cutting clean openings around electrical boxes easy.
- Screw gun or impact driver – A reciprocating saw is also helpful for cutting old framing.
- Measuring tape, square, chalk line – Standard layout tools.
- 2x4s – For new wall framing. 2x3s work for a non-load-bearing closet wall, but 2x4s are easier to work with and more common.
- Drywall – Half-inch sheets are standard. 5/8-inch if you need fire-rated for an attached garage wall.
- Trim (baseboards, casing) – Match existing for a seamless look.
- Closet system components – Wire shelving, modular panels, or a pre-built system like IKEA PAX.
- Safety gear – Safety glasses, dust mask, work gloves. You will generate dust.
Most of these are standard home improvement items. I recommend spending a bit more on a quality laser level and a drywall saw. They make the entire process faster and more accurate.
Permits and Structural Considerations (Don’t Skip This)
This is the section I wish someone had sat me down and explained before my first major project. Here’s my mistake: I started cutting into a wall without confirming it wasn’t load-bearing. I had checked the attic, saw joists running perpendicular, and assumed I was safe. Halfway through demolition, I realized I was wrong. The wall was supporting a small section of roof. I had to stop everything, call a structural engineer, and pay for a temporary support wall while I framed a steel beam. That set me back a week and about $600.

When do you need a permit?
If you are moving any wall that could be structural, you likely need a permit. Even if the wall is non-load-bearing, most jurisdictions require a permit for any alteration involving new walls, especially if you are moving electrical or adding new circuits. Call your local building department before you pick up a saw. It’s a five-minute phone call that can save you thousands in fines and rework.
How to tell if a wall is load-bearing:
- Check the attic or crawlspace. Look at the direction of your ceiling joists. If the wall runs perpendicular to the joists, it’s likely load-bearing.
- Look for a double top plate on the wall (two 2x4s stacked) or support posts below it in the basement or crawlspace.
- If the wall is an exterior wall, it’s almost certainly load-bearing.
If you’re unsure, hire a structural engineer. A consultation is usually under $500 and saves you from guessing. For my second conversion, I simply had the engineer sign off on the plan. It cost me $350 and took one hour.
Step 1: Clear Out and Measure Your Existing Space
Empty the closet completely. I mean everything. Don’t just push stuff to one side. Take out the rods, the shelves, the shoes, the vacuum cleaner you forgot was in there. You need to see the bare bones.
Now measure everything with a tape measure. Measure the depth of the current closet from the back wall to the face of the door frame. Measure the width from inside corner to inside corner. Then measure the adjacent area you plan to expand into. Account for the thickness of the wall you’re removing or modifying. Standard stud walls are about 4.5 inches thick.
Also, check for electrical boxes. Are there outlets or switches on the walls you plan to move? That means you’ll need to relocate wiring. It’s doable, but it adds time.
Use painter’s tape to mark the new layout. Tape the floor where the new walls will go. This gives you a physical feel for the space. Walk through it. Will you have enough room to open drawers? Can you turn around without bumping into clothes? This simple tape outline has saved me from building closets that look good on paper but feel cramped in reality.
Step 2: Framing the New Walls (or Modifying the Existing Ones)
This is where the actual construction begins. If you’re expanding into another room, you need to frame new walls. If you’re reconfiguring, you might just be adding a new interior wall to create an L-shape or to support a new door opening.
For new walls:
- Start by cutting your bottom and top plates. Lay them out on the floor side-by-side and mark the stud locations every 16 inches on center. This keeps your wall straight.
- Install the bottom plate to the floor and the top plate to the ceiling, making sure they’re plumb with a level. Use a laser level to get the top plate perfectly aligned.
- Cut your studs to length (standard 8-foot walls require 92.5-inch studs for a 4×8 sheet of drywall). Nail them in place.
- If you’re adding a door, frame the opening with a header and cripple studs. A standard closet door opening is 24 to 30 inches wide. A single door is easier to swing than a double.
- If you need to run electrical, now is the time to drill holes through the studs or plates for the wiring. Don’t drill through the middle of the stud if you can avoid it; the edge is safer.
A note of caution: if you’re cutting into existing walls, be extremely careful of any hidden wires or pipes. Use a stud finder that also detects live wires. I’ve had to patch a few drywall holes from hitting cables I didn’t see.
For most homeowners, this is the step where it makes sense to call a pro if you’re not confident with a saw and a level. A good carpenter can frame a small walk-in in a day. It cost me $600 for labor on my second project, and it was worth every penny to have walls that were perfectly square.

Step 3: Drywall, Mud, and Paint – Making It Look Like a Room
This is the tedious part. There’s no way around it. Hanging drywall is straightforward: cut sheets to size, screw them into the studs, and make sure seams are staggered. But the finishing requires patience.
Start with the ceiling if you’re doing one, then the walls. Use a drywall lift for the ceiling sheets if you can borrow one. I did my first ceiling by myself with a T-bar support and regretted it. Second time, I rented a lift for $40. It was worth it.
For taping and mudding, here’s the trick: thin coats are better than thick ones. Apply compound, embed the tape, then wait. Sand lightly. Apply a second coat wider than the first. Sand again. A third coat over the screws and any rough spots. The sanding produces fine dust that gets everywhere. Seal the room off with plastic sheeting if you can.
Once it’s smooth, paint. I recommend a light, matte or eggshell finish. White or light gray makes a small space feel larger. Semi-gloss feels too shiny for a closet. Flat paint is hard to clean. Eggshell is the sweet spot.
This step took me three days for a 5×7 walk-in. It’s not hard work, but it’s detail-oriented. Don’t rush the mudding. A bad joint will haunt you every time you open the door.
Step 4: Flooring Choices – What Works Best for a Walk-In Closet?
Your floor choice matters more than you think. It affects comfort, durability, and how the closet integrates with the adjacent room.
Carpet is soft underfoot and feels warm. It’s also the most standard option for closets because it’s inexpensive. The downside: it collects dust and lint. High-heel shoes leave dents. Spills or makeup stains are harder to clean. If you go with carpet, use a low-pile style. Berber or a tight loop works best.
Luxury vinyl plank (LVP) is my personal recommendation for a walk-in. It’s water-resistant, durable, and looks like wood without the cost. It’s easy to clean with a quick sweep. It feels slightly cushioned underfoot compared to tile. I put a light gray LVP in my second conversion, and it’s held up perfectly for three years. If you’re connecting to a hardwood floor in the bedroom, LVP can also be a good transition if you match the color.
Engineered wood is another option if you want a higher-end look. It’s more expensive and more susceptible to moisture. In a closet, it’s fine as long as the room stays dry, but it scratches more easily than LVP.
If you’re keeping the existing subfloor, make sure it’s clean and level before installing your new floor. I had to sand down a high spot in the plywood on my first project. It took 20 minutes but avoided a squeaky floor forever.
Step 5: Installing Lighting and Electrical
A walk-in closet without good lighting is a regret you’ll feel every morning. A single bulb in the center of the room works, but it’s not ideal. The light casts shadows when you’re standing at the rod.
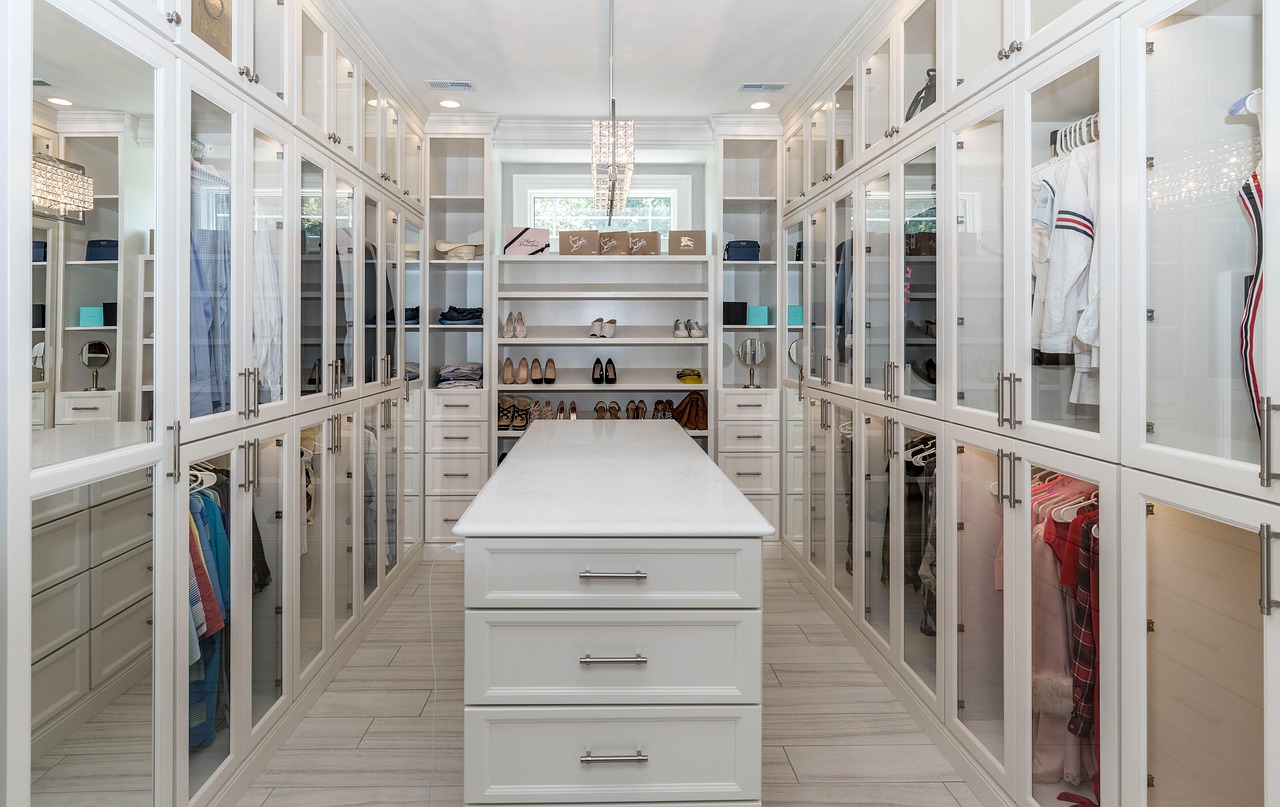
I prefer recessed LED lights, evenly spaced. For a 5×7 closet, two recessed lights are plenty. They provide clean, shadow-free light. You can also use a small flush-mount LED fixture if you don’t want to cut into the ceiling.
Track lighting is another option if you want to direct light at specific areas, like a shoe wall or a jewelry counter.
If you’re adding a switch, put it inside the closet, near the door, at a comfortable height. A motion sensor switch is a nice upgrade. It turns on automatically when you open the door and turns off after you leave. No fumbling in the dark.
Wiring a new switch or light requires running a new circuit from an existing junction box. If you’re not experienced with home electrical, hire a licensed electrician. This is not the place to experiment. I’ve done my own wiring on multiple projects, but I still call an electrician if it involves pulling wire through existing walls. The peace of mind is worth the $150-200 it costs.
Step 6: Choosing and Installing a Storage System
This is the fun part. Your new walk-in is framed, drywalled, painted, lit, and floored. Now you get to fill it with storage that actually works for how you live.
You have three main options:
Wire shelving is the budget-friendly choice. It’s easy to install, adjustable, and allows air circulation. The downside: it looks less polished, and wire shelves can sag under heavy loads. Brands like ClosetMaid are widely available. I used wire shelving in my first conversion and it served me well for years. It’s a great option if you’re working with a tight budget and want something functional quickly.
Modular systems like IKEA PAX are my personal go-to for a DIY-friendly, high-end look at a mid-range price. The PAX system offers customizable widths, heights, and configurations. You can mix drawers, shelves, pull-out pants racks, and shoe shelves. Installation requires building the frames and attaching them to the wall. It’s a weekend project. The cost for a 5-foot-wide setup with a few drawers and shelves runs about $400-600. I’ve installed three PAX systems in various closets and consistently recommend them for the balance of cost and quality.
Built-in custom is the premium route. A carpenter builds shelves, cubbies, and drawers directly into the wall. This gives you a completely seamless look and is the most efficient use of space. The catch: it’s expensive. A small walk-in custom build can easily run $3,000-5,000. I’ve only done this once, for a walk-in that doubled as a home office. The result was incredible, but the budget was significant.
Installation tip: Start with the rod height. Install the rod first at about 66 inches for double hanging or 84 inches for single. Then install shelves around it, adjusting for your specific items. Leave space for shoes on the floor, and add a few hooks or a valet rod for next-day outfits. If you prefer a more organized system, consider searching for a closet organizer system that fits your layout.
Budgeting Your Conversion: DIY vs. Hiring a Pro
Let’s talk numbers. Here’s a realistic breakdown based on my two projects and dozens of other conversions I’ve helped with.
Simple interior reconfiguration (no wall moved):
- Materials (2x4s, drywall, mud, paint, trim): $200-400
- Tools (if you don’t own them): $100-200
- Lighting (fixtures, wiring, switch): $50-150
- Storage system (wire shelving or modular): $150-800
- Total DIY: $500-1,500
- Total with hired labor (framing, drywall): $1,500-3,000
Expansion into adjacent room (wall moved):
- Materials: $500-1,000 (more if you need to patch floors or move electrical)
- Permits and engineer: $200-500
- Labor (framing, drywall, electrical): $1,500-4,000
- Flooring: $200-600
- Storage system: $500-2,000
- Total DIY with some hired help: $3,000-6,000
- Total with full contractor: $6,000-12,000
My advice: spend money on the structural and electrical work. That’s not where you want cut corners. Save money on the finishing touches like paint, shelving, and trim. You can always upgrade the storage system later, but bad framing stays visible forever.

Common Mistakes to Avoid in a Closet Conversion
I’ve made enough mistakes for both of us. Here are the ones that matter most:
- Forgetting about door swing. This is the most common oversight among beginners. You frame a beautiful walk-in, then realize the door opens into the closet, taking up precious floor space. Plan for the door to swing outward into the bedroom or the hallway. If that’s not possible, use a sliding or pocket door.
- Not insulating shared walls. If your closet shares a wall with a bathroom or laundry room, you’ll hear every flush and spin cycle. Insulation is cheap (about 50 cents per square foot) and dramatically reduces noise transfer. I installed R-13 fiberglass batts in my second project. The difference is noticeable.
- Poor ventilation leading to mildew. Walk-in closets without windows can trap humidity. If you live in a humid climate, add a small ventilation fan or a dehumidifier. I’ve seen clothes get a musty smell in closets that lack airflow. A simple louvered door or a gap under the door helps.
- Underestimating the mess. A closet renovation creates a surprising amount of dust and debris. Sheetrock dust gets everywhere. Seal off the room with plastic sheeting and tape. Use a shop vac with a HEPA filter. Plan for at least two deep cleanings after the work is done.
- Rushing the planning phase. The most successful conversions I’ve done were the ones I spent the most time planning. Sketch the layout. Buy all materials before starting. Have the electrician scheduled. If you start cutting walls and then realize you need to order a special shelving unit, you lose momentum and risk mistakes.
Final Checklist Before You Start
Before you pick up your first tool, run through this quick list:
- [ ] Confirm your space meets the minimum dimensions (4×5 feet).
- [ ] Determine if you need a permit. If yes, apply before starting.
- [ ] Identify load-bearing walls. If uncertain, hire a structural engineer.
- [ ] Measure the existing closet and adjacent area, accounting for wall thickness.
- [ ] Choose your approach: expansion or reconfiguration.
- [ ] Gather all tools and materials.
- [ ] Order your storage system (modular or wire) and verify it fits within your dimensions.
- [ ] Schedule any hired labor (electrician, framer) in advance.
- [ ] Set a realistic timeline: 1-2 weekends for a simple project, 2-3 weeks for an expansion.
- [ ] Clear the area and seal off the work zone from the rest of your home.
A walk-in closet is more than a storage upgrade. It’s a daily experience that makes your morning routine easier and your space more enjoyable. The work is real, but so is the reward. Start with the checklist, take the planning seriously, and you’ll end up with a closet that feels like it was always meant to be there.