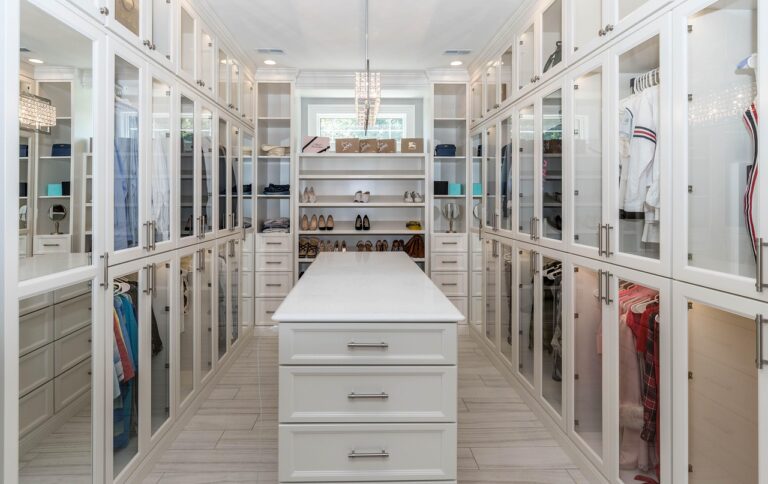
Walk-In Closet Ideas for Attic Spaces with Sloped Ceilings
Introduction
That awkward attic space with sloped ceilings—the one currently holding holiday decorations and forgotten suitcases—could become the walk-in closet you’ve been wanting. Designing a functional closet under eaves and rafters comes with real challenges. But with the right approach, it can work better than a standard reach-in or even a dedicated bedroom closet. This article is for homeowners who look at their underused attic and see potential, not problems. We’ll cover practical sloped ceiling closet ideas, from storage solutions and layout strategies to product recommendations and common mistakes to avoid. The goal is simple: give you the information you need to turn that awkward space into something genuinely useful.
Why Attic Spaces Make Tricky (but Rewarding) Closets
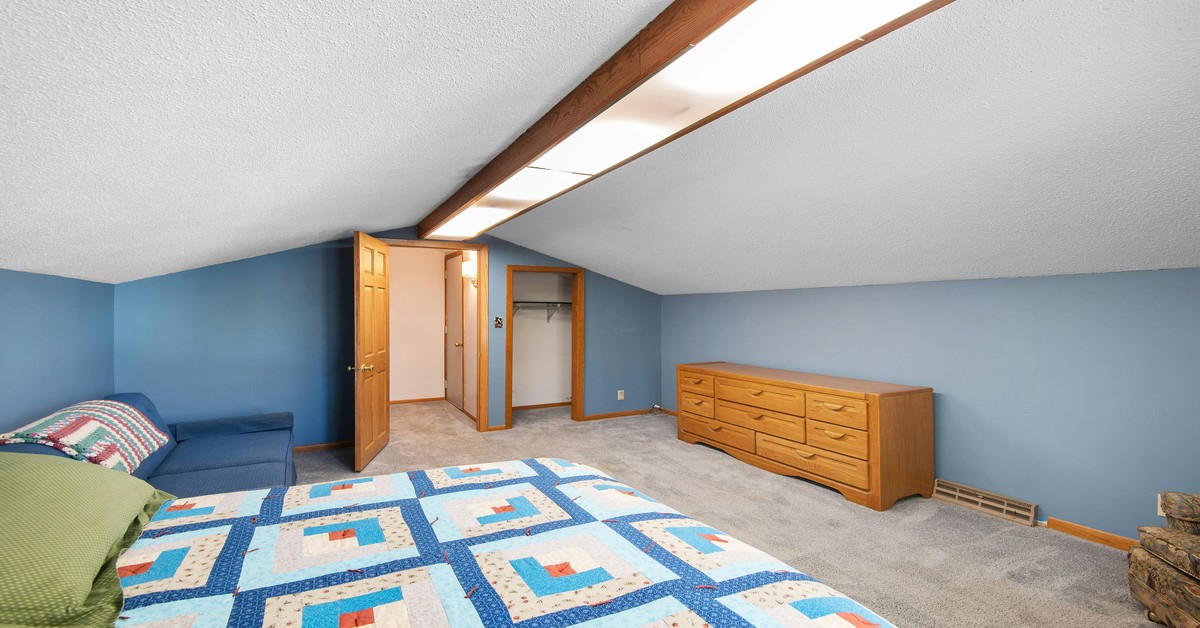
Attics come with built-in geometry problems: low points along the eaves, knee walls that limit depth, and rafters that break up flat surfaces. Many homeowners write off this space because standard closet systems assume straight, vertical walls. But an attic closet, when done right, offers something a standard closet can’t: privacy, separation from the bedroom, and potential home value. It’s a dedicated dressing area, not an afterthought.
The key is to measure before you plan anything. Don’t just measure the highest point—measure the lowest point where you intend to place storage. Note where the sloped ceiling starts and ends. A 4-foot knee wall might be perfect for low shoe storage, while the peak can handle long dresses. For those tackling the measuring and planning phase, a reliable laser measuring tape can make recording these dimensions much easier and more accurate. The challenge is real, but so is the reward. With careful planning, an attic closet can offer more usable storage than many ground-floor closets, simply because it occupies a larger footprint.
Key Layout Strategies for Sloped Ceilings
The biggest layout mistake people make is trying to force a standard closet design into a sloped space. It doesn’t work. Instead, work with the angle.
Position hanging rods parallel to the slope. This means rods run along the long wall, not perpendicular to it. Perpendicular rods force you to duck under low points, wasting headroom. Parallel rods let you hang garments at the highest part of the slope, where they have full length.
Use the highest point for long garments. Dresses, coats, and long pants need at least 50 inches of vertical clearance. That’s only available near the peak. Reserve that zone for items that hang full-length.
Add low shoe storage under knee walls. Those short walls (typically 3 to 5 feet tall) are perfect for angled shelving or pull-out shoe racks. You can’t stand there anyway, so use the space for items you access at ground level.
Place drawers in the tallest section. Drawers need space to open fully. Install them in a spot where you can stand upright, usually where the ceiling reaches its maximum height. Avoid placing drawers near the eaves—you’ll just hit your head.
Best for: Built-in custom systems are ideal for attics because they can be tailored to every angle and alcove. But custom work costs more and requires a professional. Modular systems from brands like ClosetMaid or EasyClosets are cheaper and DIY-friendly, but they assume flat walls. You can adapt modular systems by cutting down side panels or using filler strips, but it takes patience. If you’re handy with a saw and tape measure, modular is a realistic option. If you want a seamless look and don’t mind paying for it, go custom.

Storage Solutions That Work With the Slope
Specific products can make or break an attic closet. Standard shelving from a big box store won’t cut it. Here’s what actually works in sloped spaces:
- Adjustable hanging rods. A hanging rod that can be repositioned up or down is invaluable. You can move it to accommodate different garment lengths or lower it for easier access under a low ceiling. Look for rails with brackets that slide along a track—they give you flexibility without drilling new holes.
- Slanted shoe racks. Instead of flat shelves that waste vertical space, use angled racks that fit under knee walls. These keep shoes visible and accessible without requiring you to bend awkwardly.
- Low-profile drawers. Standard drawer slides need 18–24 inches of depth. In shallow knee-wall zones, look for shallow drawers (6–12 inches deep) that can hold folded items without wasting space behind them.
- Tension rods for accessories. A simple tension rod placed horizontally between two rafters creates instant hanging space for scarves, belts, or ties. It takes ten seconds to install and costs almost nothing.
- Deep pull-out bins. For bulky items like sweaters or off-season bedding, deep bins mounted on heavy-duty slides work well in low-ceiling areas. Pull them out like drawers to access everything at once. Don’t use fixed shelves in these zones—you’ll lose items in the back permanently.
These products solve real convenience and space problems. Don’t skip them just to save a few dollars. The difference between a frustrating attic closet and a functional one is often just a few smart product choices. For maximizing low knee-wall areas, heavy-duty pull-out storage bins can be a practical and space-efficient solution.

Lighting and Ventilation: Don’t Skimp on These
Attics are naturally dark and prone to stuffiness. A single overhead bulb on a pull chain isn’t going to cut it for a closet you actually use.
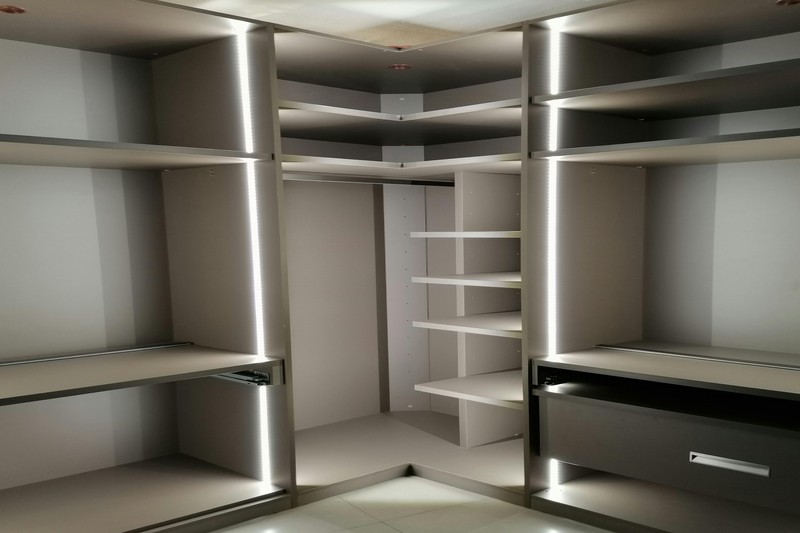
LED strip lights. Install these under shelves, above hanging rods, and inside drawers. They provide task lighting exactly where you need it, without casting shadows. Motion-sensor LED strips are particularly useful—they turn on when you open the closet door and off when you leave. No fumbling for switches.
Recessed can lights in the ceiling peak. If your attic has enough headroom, recessed lights positioned along the highest ridge of the ceiling provide general illumination without hanging fixtures. Make sure they are IC-rated for contact with insulation.
Small fan or dehumidifier. Attics trap heat and moisture. A compact dehumidifier (30–50 pints per day) prevents mustiness and protects clothing. A small exhaust fan can help if the space gets warm during summer months. Don’t skip this. Mold in an attic closet is much harder to fix than in a regular room.
Avoid relying on a single overhead fixture. You need layered lighting: ambient (overhead), task (under shelves), and accent (inside glass-front drawers if you have them). Good lighting makes the space feel twice as large and half as cramped.
Custom Built-Ins vs. Modular Systems: What’s Right for Your Attic?
This is the biggest decision you’ll make. Here’s how they compare:
Custom built-ins. A carpenter measures every angle, builds cabinets and shelves on-site, and fits them perfectly to your attic’s quirks. The result is seamless, strong, and uses every inch of space. The downsides: cost (typically $8,000–$15,000 for a mid-size walk-in), time (several weeks), and permanence (you can’t take it with you).
Modular systems. These are pre-fabricated panels, rods, and drawers that you assemble. Brands like EasyClosets and ClosetMaid offer design tools online where you input your dimensions and they ship you a kit. Cost is lower ($500–$3,000), installation is DIY, and you can reconfigure or move it later. The downsides: they assume flat walls and 90-degree corners. Attic angles require creative problem-solving—cutting panels, adding filler strips, or leaving gaps that you cover with trim.
Decision guide:
- Modular is best if you plan to move within five years, have a tight budget, or enjoy weekend DIY projects.
- Custom is best if this is a forever home, you have complex angles (dormers, multiple roof pitches), or you want a finished look that adds resale value.
There’s a middle ground: semi-custom. Some closet companies offer adjustable components that aren’t fully custom but are more flexible than standard modular kits. This can be a good compromise for attic spaces with moderate slopes.
5 Common Mistakes When Designing an Attic Closet
- Not measuring the lowest ceiling point first. Everyone measures the peak. But the low point determines what fits where. If you don’t know your lowest clearance, you’ll end up with drawers that can’t open or shelves that block movement. How to avoid: Measure ceiling height at every point where you plan to put storage. Mark low spots on your floor plan.
- Ignoring insulation and vapor barriers. Attics are part of the building envelope. Without proper insulation, your closet will be hot in summer, cold in winter, and potentially damp year-round. Climates with temperature swings require a vapor barrier between the drywall and insulation. How to avoid: Consult a local contractor about your specific climate needs. Don’t skip this step.
- Forgetting about access. Narrow attic stairs limit what you can bring up. A pre-built modular closet panel might be 8 feet long. Can you fit it up your stairs? Maybe not. How to avoid: Measure your stair width and any door openings before ordering large components. Consider flat-pack modular systems that come in smaller boxes, or have custom built-ins assembled on-site.
- Overbuilding in low-traffic zones. Not every part of an attic closet needs heavy-duty shelving. Low-use zones (like deep corners under the eaves) can take lighter, cheaper storage. How to avoid: Match the storage type to the expected use frequency. Don’t install solid wood drawers in a spot you’ll only open twice a year.
- Skipping proper floor reinforcement. Heavy shelving units, full hanging rods, and built-in drawers add significant weight. Standard attic joists might not be designed for it. How to avoid: Check your floor joist span and spacing. If in doubt, add a sheet of plywood subfloor over the existing decking, or consult a structural engineer for heavy loads.
Adding a Window or Skylight: Pros and Cons
Natural light transforms an attic closet. It makes the space feel larger, reduces reliance on artificial lighting, and adds home value. But adding a window or skylight isn’t always straightforward.
Pros: A skylight in the roof slope brings in overhead light without taking up wall space. A small window in a gable end provides ventilation along with light. Both options can make a cramped attic feel open and inviting.
Cons: Cost is significant—$2,000–$5,000 for a skylight including installation, more for a dormer window. There’s always a risk of leaks if the flashing isn’t perfect. And a window takes up wall space that could be used for storage.
Middle ground: Solar tubes (tubular skylights) are a cheaper, less invasive option. They bring natural light through a reflective tube without requiring structural changes to the roof. They don’t provide ventilation, but they add brightness without the leak risk of a full skylight. If you already have a window, add blackout blinds if the space gets too bright, or UV-protective film to prevent fading of clothes.

Only add a window or skylight if the closet is a long-term feature for your home. For a temporary or budget conversion, skip it and invest in good LED task lighting instead. If you decide to go with a skylight, solar tube skylight kits are a practical alternative worth considering.
Flooring and Wall Finishes That Hold Up Over Time
Attic spaces experience temperature swings and potential moisture. Your finish choices matter.
Flooring: Carpet is soft underfoot but traps dust, stains easily, and can harbor mold if moisture is present. Luxury vinyl plank (LVP) is a better choice for most attics. It’s water-resistant, durable, and easy to clean. It’s also less expensive than hardwood and easier to install. For a warmer feel, add a washable rug runner.
Walls: Drywall is standard but makes attaching shelving and rods difficult—you need to find studs or use toggle bolts. Plywood or MDF sheathing is a practical alternative. You can screw directly into it anywhere, which simplifies future adjustments. It also adds rigidity to the walls. The visible plywood grain can be painted or left natural for a rustic look. Pegboard is another option if you want maximum flexibility for hanging accessories and tools.
Best for budget: LVP flooring + painted drywall (cheapest upfront, but harder to add shelving later). Best for durability: LVP flooring + plywood sheathing (costs more but allows easy storage adjustments and resists moisture better).
Small Touches That Make a Big Difference
These are the finishing details that turn a functional closet into a pleasant one. They don’t cost much but significantly improve daily use.
- Full-length mirror mounted on a knee wall. A mirror is essential for dressing, but in a sloped space, it can also make the room feel larger. Mount it on a knee wall where you can stand far enough back to see yourself.
- Small bench or ottoman. A place to sit while putting on shoes is a luxury in a small attic closet. Choose a bench narrow enough to fit under a low ceiling section.
- Jewelry tray on a drawer or shelf. A dedicated tray keeps small items organized and prevents them from getting lost in deep drawers.
- Valet rod. A pull-out or fixed rod near the door lets you stage outfits for the next day. It’s a small feature that saves morning hassle.
Add these after the main storage system is installed. They’re easy to incorporate without major planning.
Real-World Budget Breakdown: What to Expect
Costs vary widely based on your choices. Here’s a realistic range:
- Low-end ($500–$1,000): Modular system from ClosetMaid or similar, DIY installation, basic LED shop lights, LVP flooring. This gets you functional storage, but won’t look custom. Expect to spend most of your budget on shelving and rods.
- Mid-range ($2,000–$5,000): Semi-custom system from a closet company, better lighting (recessed cans + LED strips), upgraded flooring, and a small dehumidifier. This is where you get a finished look and better materials.
- High-end ($8,000–$15,000): Full custom built-ins, premium flooring, skylight or solar tube, professional installation, and high-end finishes like solid wood drawers and soft-close hinges. This adds home value and long-term durability.
Where should you spend your money? Prioritize slope-appropriate storage. A custom hanging rod system that fits your angles is worth more than expensive flooring you’ll mostly cover with rugs. Save on finishes and invest in storage that works with the space, not against it.
Frequently Asked Questions About Attic Closets
Can I use an attic closet for long dresses?
Yes, if you place the hanging rod at the highest point of the ceiling. That’s the only spot with enough vertical clearance for full-length garments. Reserve that section for dresses, coats, and long pants.
Do I need planning permission?
In most areas, converting an attic to storage space doesn’t require a permit, but adding windows, skylights, or structural changes often does. Check your local building codes before starting. Some areas also have rules about ceiling height for habitable spaces—a closet might be exempt, but it’s worth confirming.
How do I handle insulation?
Rigid foam insulation installed behind drywall is best for attic walls. It provides good R-value without taking up much space. Fiberglass batts work but are bulkier. Always include a vapor barrier on the warm side of the insulation to prevent moisture problems.
What if my attic floor isn’t level?
Use shims under shelving and cabinet bases. Adjustable feet on modular systems can also compensate for minor slopes. For significant unevenness, consider leveling the entire floor with a self-leveling compound before installing anything. It’s extra work, but prevents wobbly storage later.
Start Designing Your Dream Attic Closet Today
Your awkward attic has real potential. Measure carefully, prioritize storage at the highest point, choose a system that fits your budget and skill level, and don’t skimp on lighting. The difference between a wasted attic and a dream closet is mostly planning—not money. Grab a tape measure, sketch your layout, and look at modular options or local carpenters. Your new closet is closer than you think. Start today.